Change WordPress Admin Username from Dashboard
This step-by-step guide will aid you in altering the admin username of your WordPress site from the Dashboard.
By default, the administrator username in WordPress is “admin”. However, it is crucial to change this username to enhance the security of your WordPress website.
1) To begin, first log in to your WordPress wp-admin page.
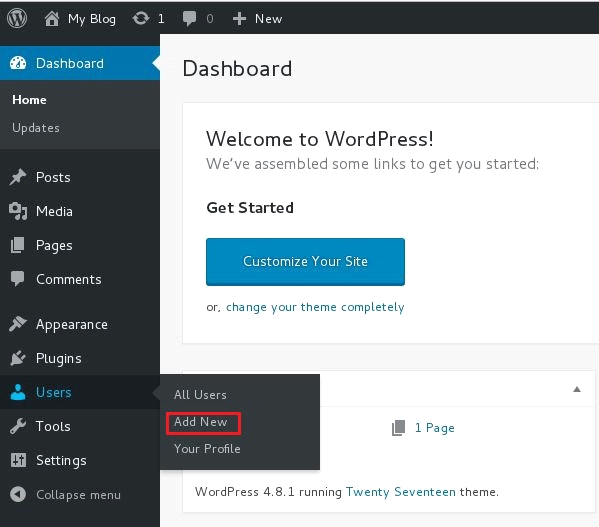
2) Navigate to the Dashboard and select Users from the menu, then click on Add New.

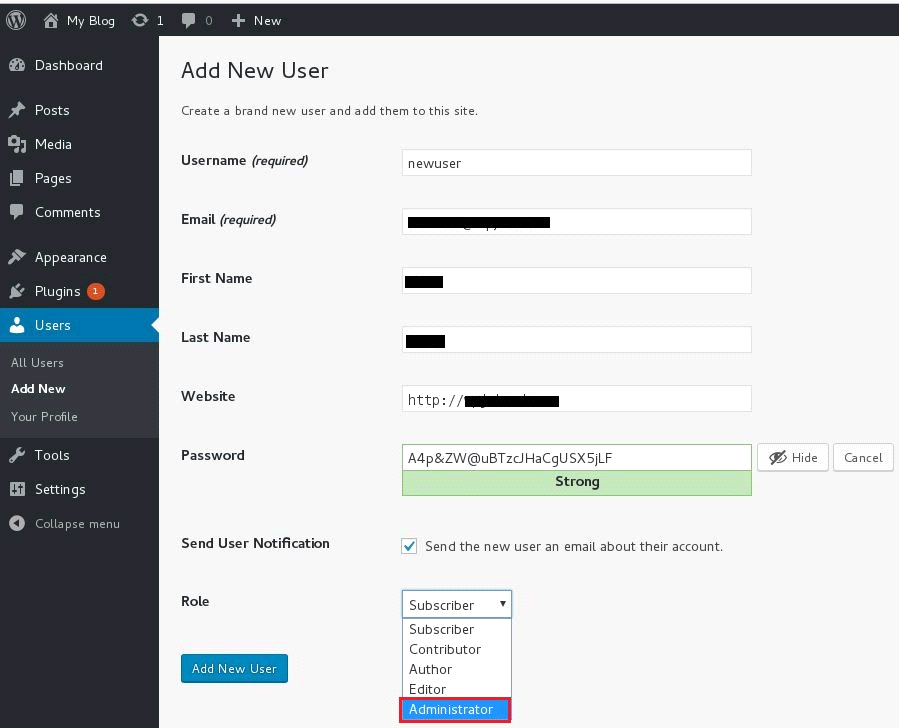
3) Prior to clicking on Add New User, choose “Administrator” in the Role field.

4) Now, you will be able to see the new user created.

5) The next step involves deleting the current admin user.
6) It is essential to create a backup of the WordPress database before deleting the admin user.
7) Log out from the admin account and log in using the new user credentials.
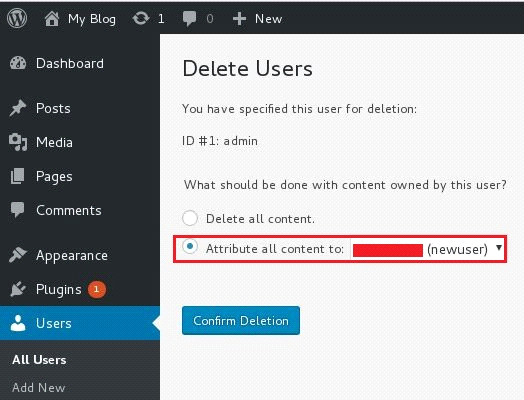
8) Once logged in, delete the old admin user.

9) Before confirming the deletion, choose “Attribute all content to newuser” from the dropdown box.

10) Congratulations! The admin username has now been successfully changed to the new user.


